This is a step by step guide on sending a simple message using ballerina. If you have no idea on Ballerina, go to the ballerinalang.org. You need to setup the ballerina composer as well to follow the guide.
Let’s try a simple scenario where a patient makes an inquiry specifying the doctor's specialization(category) to retrieve a list of doctors that match the specialization. The required information is available in a microservice deployed in the MSF4J profile of WSO2 EI. We will configure an API resource in WSO2 Enterprise Integrator (Ballerina) that will receive the client request, instead of the client sending messages directly to the back-end service, thereby decoupling the client and the back-end service.
Before you begin,
Install Oracle Java SE Development Kit (JDK) version 1.8.* and set the JAVA_HOME environment variable.
Download the WSO2 EI ZIP file from here, and then extract the ZIP file. The path to this folder will be referred to as throughout this tutorial.
Download the MSF4J service from here and copy the JAR file to /wso2/msf4j/deployment/microservices folder. The back-end service is now deployed in the MSF4J profile of WSO2 EI.
Creating the Ballerina service
In this section we will create a Ballerina service using the Ballerina Composer to run with the Ballerina runtime that will send the incoming requests to the HealthCare backend service.
Install ballerina if you haven’t already, as explained in Install Ballerina. Now start the ballerina composer by running the command “composer” in command line. Click on new button of the welcome page to start a new .bal file.
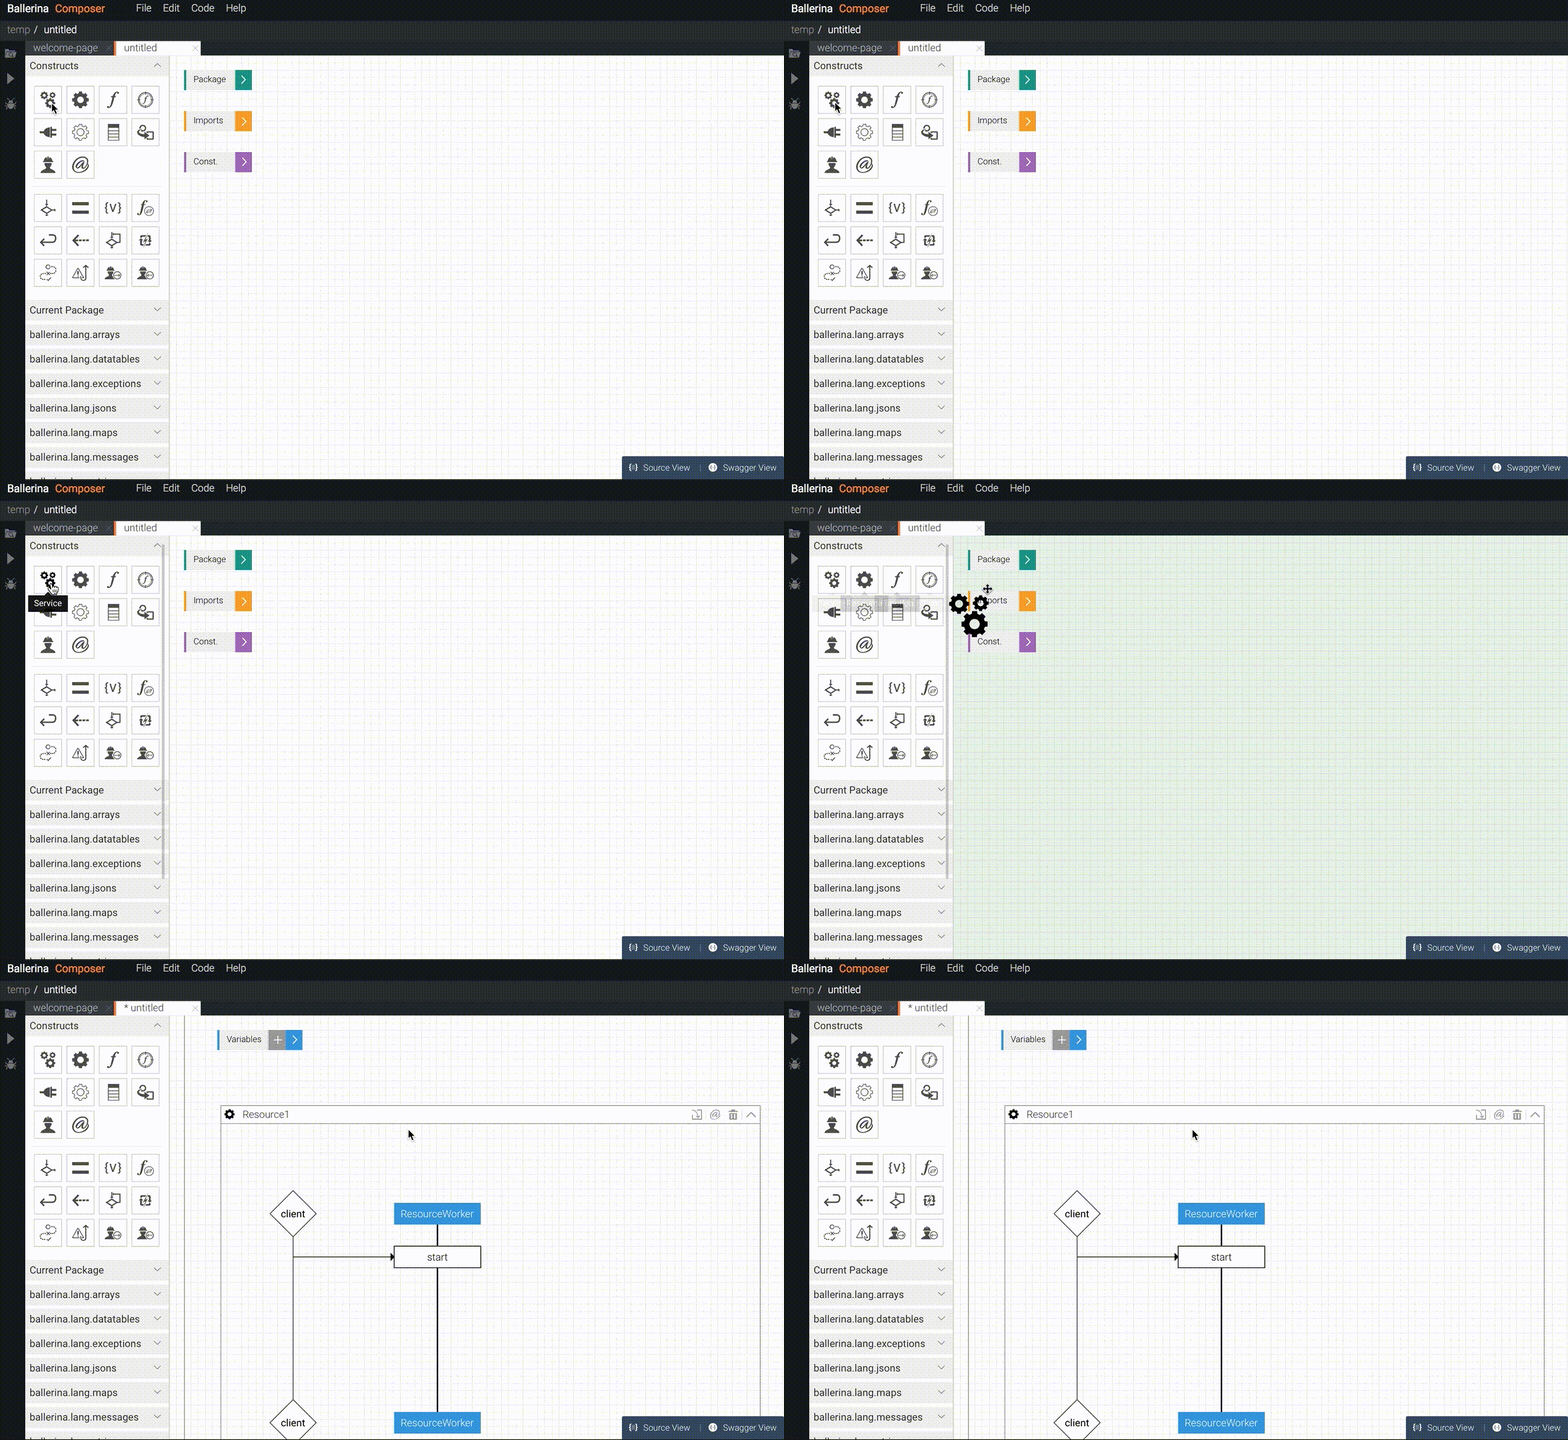
On the tool palette, click the service icon and drag it to the canvas. A new service and resource will be created for you.
Let's rename the service and resource. Highlight the name “Service1” and type “healthcareService” in its place. Change Resource1 to “doctorResource” in the same way.
Let’s set the base path for our service. In the upper right corner of the myEchoService box (not the resource box this time), click the Annotations (@) icon. Make sure http:BasePath is selected in the list, type /healthcare in the text box, and then press Enter or click the + symbol to its right. Now our service is available in http://localhost:9090/healthcareService url.
Now let’s add the rest of the resource path of our service with path params. Click the Annotations (@) icon in the upper right corner of the doctorResource box (not the service box). Select “ballerina.net.http” and then select “path”. Then type “"/queryDoctor/{category}” in the text box of the “value” sub field, and then press Enter or click the + symbol to its right.
We need to pass the “category” path param to the backend. We need to add a new variable to the “doctorResource” method to retrieve this category. Locate the “Add param” text box next to the doctorResource resource name. Add following parameter to retrieve the category path param.
@http:PathParam{value:"category"} string category
Now if you go to the source view of the service, it will look like below.
Go to the File > save(ctrl+s) to save the file. Give the name healthcareService.bal.
Go back to the design view and click on the “ballerina.net.http” from the Connectors tab in the tool palette.
Now drag and drop the Client Conenctor into the doctorResource resource box.
Now click on the string “endpoint1” in the client connector lifeline and edit the client connector. Change “endpoint1” to doctorEP and give “http://localhost:9095” inside the ClientConnector() method as a parameter which is the URL of our Msf4j server.
The full URL to the backend service should be http://localhost:9095/healthcare/{category}. Let’s create a variable with this value. Drag a assignment ( ) from the tool palette on to top of the default lifeline. Click on it and change the value to following.
string path = "/healthcare/"+ category
Since we are doing a GET rest call to the backend, drag and drop a get action ( ) from the connector tool palette to the default lifeline. Then draw a flow from get action to doctorEP lifeline. You can start drawing the flow by hovering over the get action and once the cursor changes to a pencil.
 Now click on the get action and change it’s content to following,
message response = http:ClientConnector.get(doctorEP, path, m)
Now we have assigned the response from the backend to a “message” type called response. Now drag and drop a reply action( ) from the main tool palette on to the default lifeline after the get action.
 Click on the reply action and type “response” in the box to reply with the same message from the server.
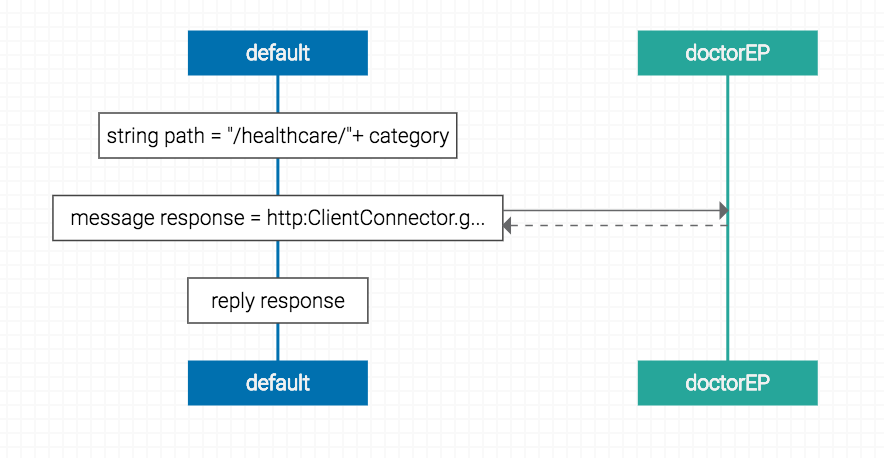
Now the full sequence of our Ballerina service will be look like below.
The source code for the service will be following.
Running the ballerina Service
Now we can start our service. You can either use the composer to start the program or ballerina CLI tools.
ballerina run service healthCareService.bal
You will get following message in the console after successfully starting the service.
Starting the MSF4J profile
To be able to send requests to the back-end service (which is an MSF4J service deployed in MSF4J profile), you need to first start the MSF4J runtime:
Open a terminal and navigate to the /wso2/msf4j/bin directory.
Since both msf4j and ballerina is running on port 9090 by default, let’s change the default port of msf4j to be able to run the both in same server machine. Go to the /wso2/msf4j/conf/transports/netty-transports.yml and change the value of the “port” to 9095.
Start the runtime by executing the MSF4J startup script as shown below.
The Healthcare service is now active and you can start sending requests to the service.
Running the sample
Open a command line terminal and enter the following request:
curl -v http://localhost:9090/healthcare/querydoctor/surgery
This is derived from the request path define when creating the API resource. http://:/healthcare/querydoctor/{category}Other categories you can try sending in the request are: cardiology gynaecology ent paediatric
|
You will see the response message from HealthcareService with a list of all available doctors and relevant details.
[{"name":"thomas collins", "hospital":"grand oak community hospital", "category":"surgery", "availability":"9.00 a.m - 11.00 a.m", "fee":7000.0}, {"name":"anne clement", "hospital":"clemency medical center", "category":"surgery", "availability":"8.00 a.m - 10.00 a.m", "fee":12000.0}, {"name":"seth mears", "hospital":"pine valley community hospital", "category":"surgery", "availability":"3.00 p.m - 5.00 p.m", "fee":8000.0} |
Now we have successfully created a service in ballerina and invoked a microservice in Msf4j. Here the Ballerina HTTP connector is used to invoke the healthcare API.

